How To Replace the Upper and Lower Thermostat Housing on a Ford 4.0L V6 SOHC Engine
Steps 4-5: Remove Thermostat, Disconnect Sensors
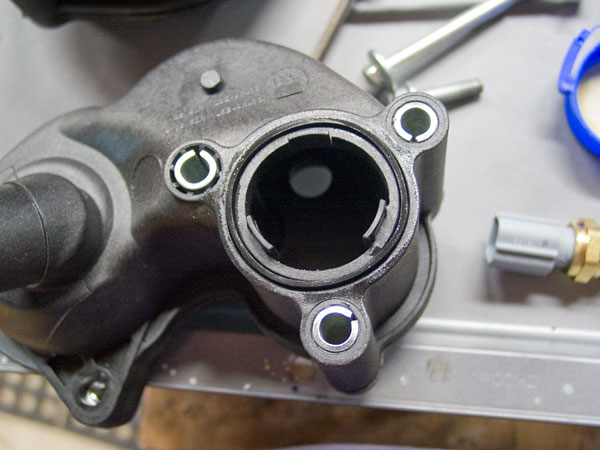
Step 4: Remove Thermostat
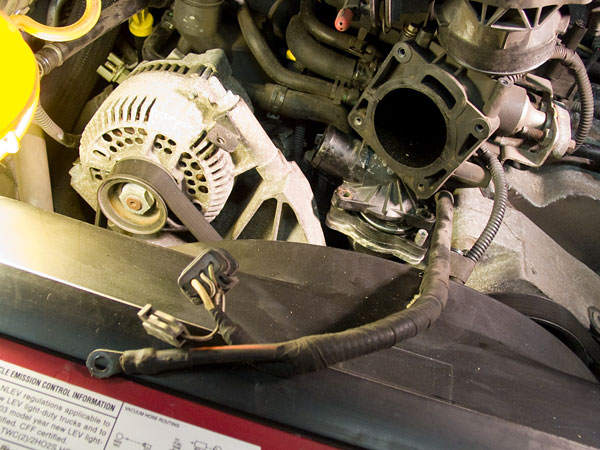
Now we need to remove the thermostat itself. First, use the channel lock pliers to loosen the squeeze clamp on the upper radiator hose (this is the big hose that wraps around the oil fill port and connects the radiator to the upper thermostat housing). Squeeze the clamp, pull it back, pull the hose off the housing, and lay it aside.
Next you need to make just a bit more room to get the upper thermostat housing off. You could probably do without this step but I found it made things much easier. Grab your 10 mm socket and follow the fat black electrical cable running over the front corner of the thermostat housing over to the generator.
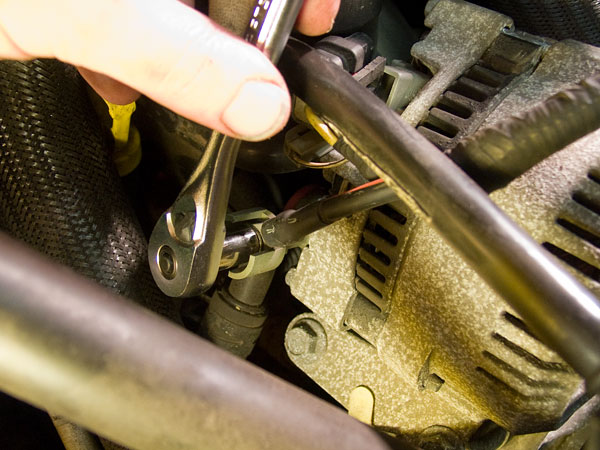
Unbolt the cable from the generator and disconnect the other two electrical connectors. Lay it aside so that it makes as much room as possible over the thermostat housing.
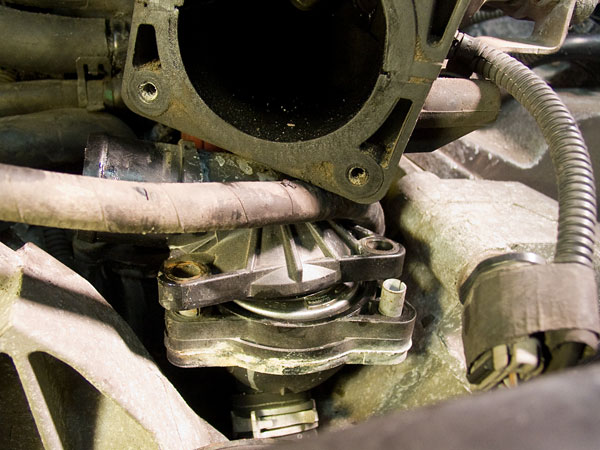
Using your 8 mm flex socket and an extension, unbolt the three bolts holding the thermostat cover on. Remove the cover.
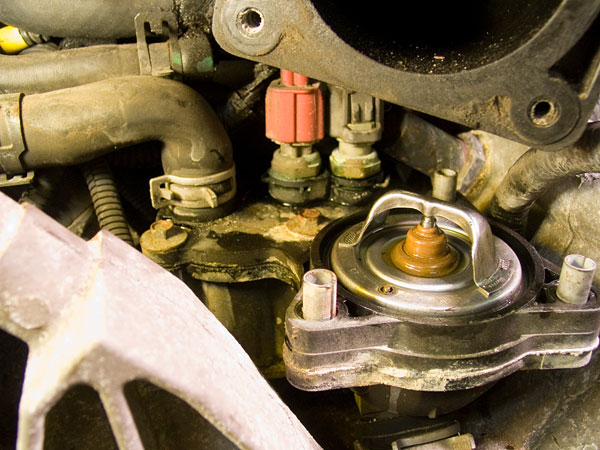
Under the cover you'll find the thermostat. There is also an o-ring around its edge. Pull both the thermostat and o-ring from the housing and set them aside.
Step 5: Disconnect Sensors, Heater Hose, and Remove Lower Housing Bolts
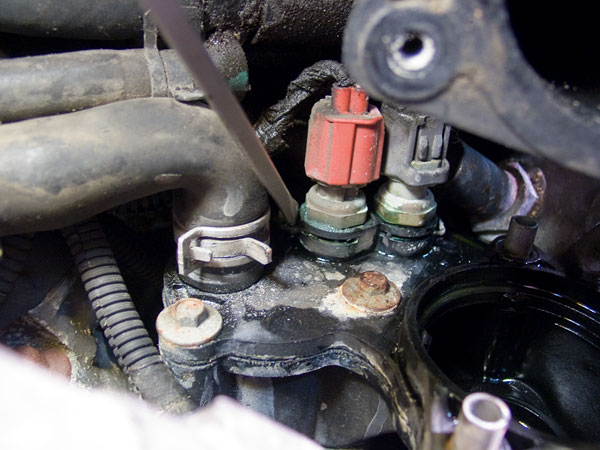
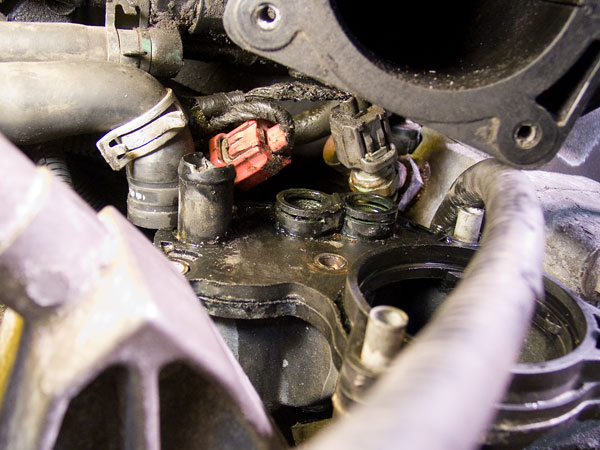
You almost have the housing out now. Just a few more things to do. First, use a screwdriver to pull the retaining clips on the two temp sensors. Pull them out almost all the way with the screwdriver, then grab your needle nose pliers to finish pulling them out so you don't drop them.
Now loosen the sensors a bit. I found it was difficult to get them out all the way at this stage, but you should be able to pull them up some. (Despite the bolt profile on the sensor, it does not screw in. They just pull up.) This will create some space so you can see the rearmost bolt.
Next you need to disconnect the heater hose. To do this, first remove the vacuum hose shown disconnected below. This will make room so you can rotate the clamp upwards on the next hose below that. That will make the space you need to lift the heater hose off the housing (after you squeeze and lift the clamp on that hose of course).
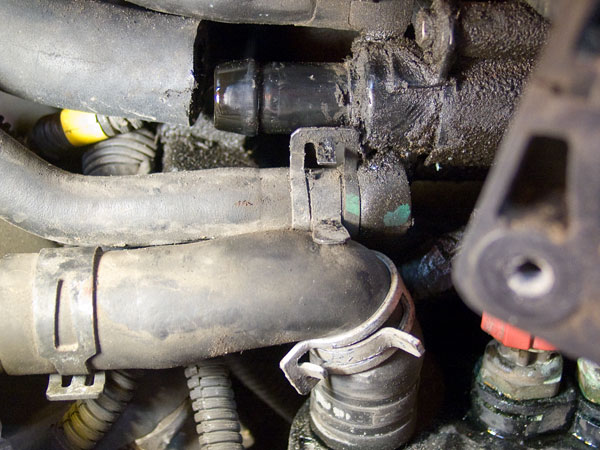
At this stage, go ahead and loosen the clamp holding the lower hose running between the bottom of the housing and the water pump. Squeeze the clamp and move it down just enough to clear the nipple. When you pull the housing up and out in a minute, it will then be able to pull out of this hose.
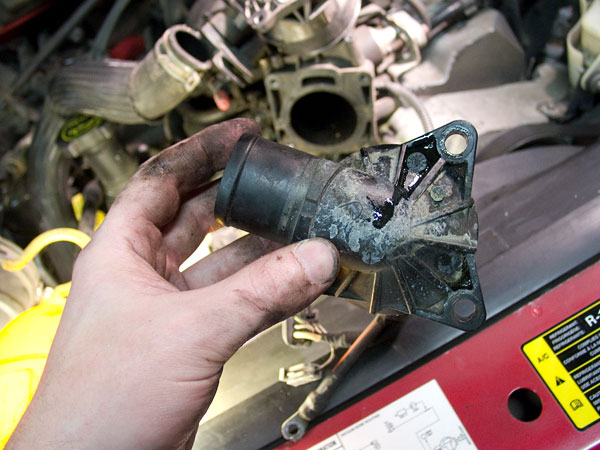
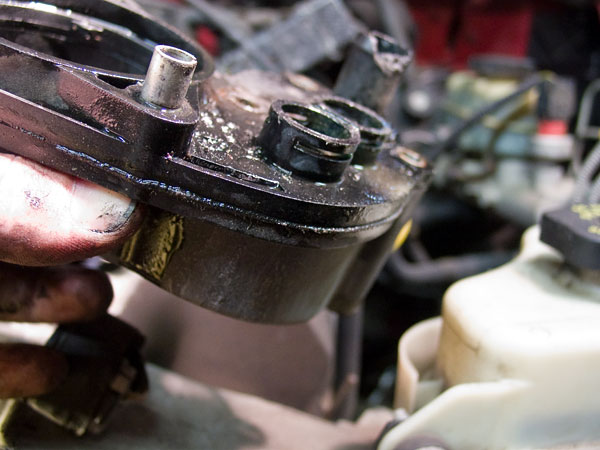
Now you can finally remove the three bolts holding the lower housing to the engine. The front two are easy. The rearmost bolt is behind the heater hose nipple on the housing. Here's where the 8 mm flex socket really pays for itself. You can't do this part without it. (Note the deterioration of the heater hose nipple on my lower housing. That wasn't expected.)
Now it's time to remove the housing. But before you do, you need to know that the housing has three tabs on its bottom side that dip into the mounting hole. In other words, DO NOT just pull the housing forward! You HAVE to lift it straight up a bit (about 1/8" to 1/4"), then pull it forward. Here's what the bottom (of my new one) looks like.
If you do pull forward and not up, you'll break those tabs off and they'll end up in the engine (ask me how I know!). I will say that I think the tabs on my old housing were very weak already so they were prone to breakage, but that's all the more reason to be careful.
Once you have the housing lifted up a bit to clear the tabs, you can rotate it a little so you can pull the sensors all the way out. Then you can coax the lower nipple out of that lower hose. From there you just need to carefully and patiently maneuver the part out of the space.
Mine had failed somewhere along that rough edge, in the area behind the sensor ports. Every time I pushed on the throttle, a stream of liquid would come squirting out of there.
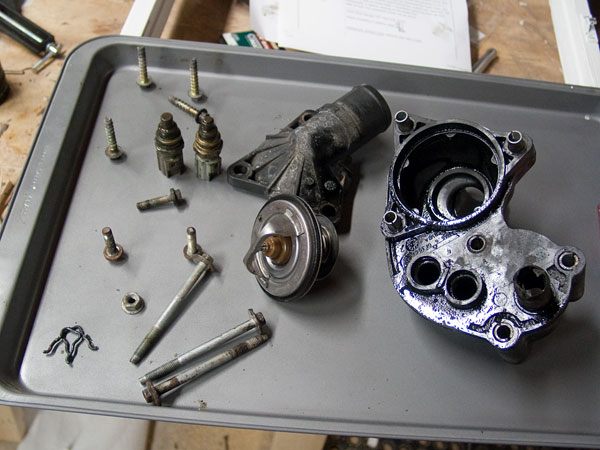
Here are all the parts you've removed. Now it's time to take a break! You've done most of the hard work. I found getting the new parts in to be easier than getting the old parts out.
Next -> Step 6: Clean Up
this site was written by ben grosser
all content and photos are © 2012 and may not be used without permission.